My Expensive Mistake with a 108-Megapixel Camera
I blew a thousand bucks on a 108-megapixel camera thinking it would instantly turn my photos into magazine covers. Spoiler alert: it didn't. In fact, my cheap old phone took cleaner shots that same evening. If you've ever felt scammed by big tech numbers, you are not alone. Let's talk about why more megapixels often mean worse photos—and how you can actually get sharp shots without emptying your wallet.
But when I took it out for a spin, my photos looked muddy and dark. I felt completely cheated and confused. My cheap old phone actually took better pictures in the evening.
This is a very common trap that almost every beginner falls into. We live in a world where tech brands blast big numbers in our faces every single day. They make us believe that a bigger number always means a better experience. So we spend our hard-earned cash on these high-megapixel promises.
But when we try to capture our precious family moments, the results are terrible. The images look noisy, grainy, and completely lifeless. It hurts when you spend hundreds of dollars and still end up with blurry memories. You feel like you are bad at photography, but the truth is different. Your skills are fine, but the marketing tricks have fooled you.
This constant confusion ruins the joy of capturing memories. You stop taking photos because you think your gear is not good enough. It is time to stop this endless cycle of disappointment and learn the real truth.
We worry so much about megapixels that we forget to enjoy the art of taking pictures. This mental stress makes us feel like we need to buy newer and more expensive gear. But more gear is not the answer. We need to understand how the tech actually works under the hood. Let us break down why those big numbers are often just empty promises.
<div style="background-color: #f9f9f9; padding: 20px; border-left: 5px solid #0073aa; margin-bottom: 25px;">
<h3 style="margin-top: 0;">📸 Quick Summary: What You Actually Need to Know</h3>
If you don't want to read the whole guide, here are the golden rules of camera gear:
<ul>
<li><strong>Sensor Size > Megapixels:</strong> A large sensor with 12 megapixels will almost always take cleaner, richer photos than a tiny smartphone sensor with 108 megapixels.</li>
<li><strong>Invest in Glass:</strong> A cheap, plastic lens ruins high-resolution sensors. Spend your money on high-quality lenses first.</li>
<li><strong>Beware of Digital Zoom:</strong> Digital zoom is just a fancy word for cropping. It stretches your pixels and makes images look muddy. Use physical optical zoom instead.</li>
<li><strong>Control Your Light:</strong> You don't need a new camera to get sharp photos. Learn to shoot in RAW, keep your ISO low, and use your lens's sweet spot (usually between f/5.6 and f/8).</li>
</ul>
</div>
The Secret Ingredient: Why Sensor Size Wins Every Time
To understand why my 108-megapixel camera failed, we have to look at the camera sensor. The sensor is the beating heart of your camera. It is a flat piece of silicon that catches light and turns it into an image.
Think of a camera sensor like a backyard during a rainstorm. If you put out a giant bucket, you will catch a lot of water. If you put out tiny thimbles, you will catch very little water.
In this story, the rain is light and the buckets are pixels. Larger sensors allow for larger pixels. These large pixels catch much more light, which makes your photos look clean and bright.
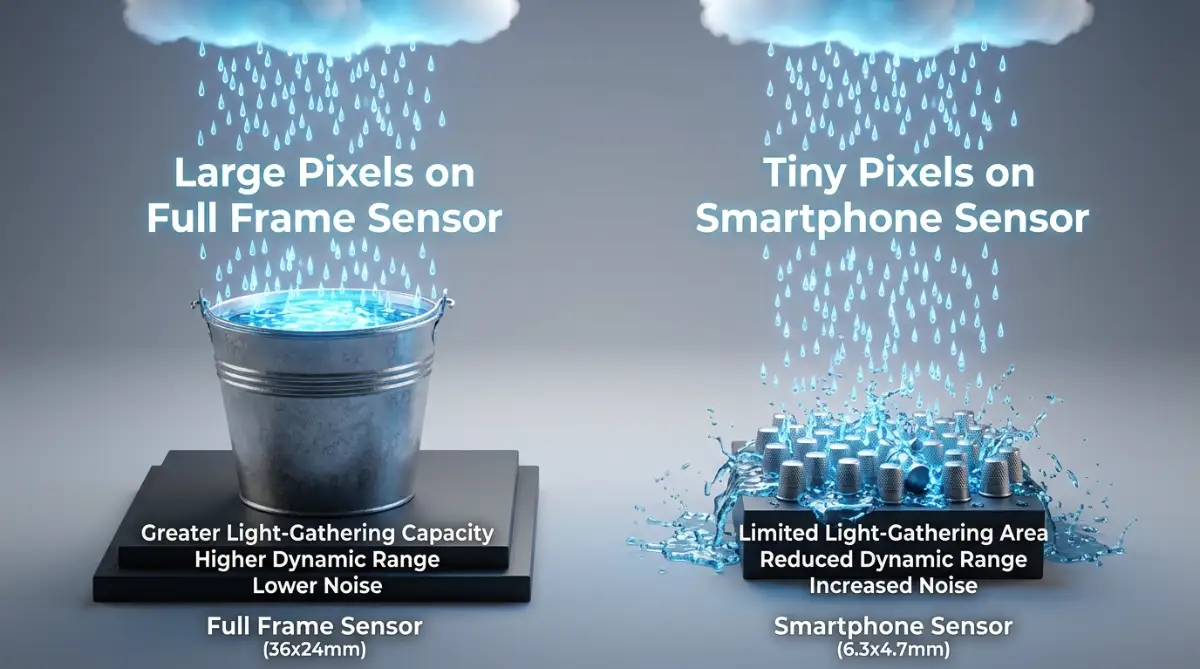
- Smartphone Camera: Tiny sensor (1/2.3"). It has poor low-light performance.
- Crop Sensor (APS-C): Medium sensor. It is a great all-rounder for hobbyists.
- Full Frame Camera: Large sensor (35mm). It offers outstanding detail and light capture.
| Sensor Type | Average Size | Best Used For | Why It Beats High Megapixels |
| :--- | :--- | :--- | :--- |
| 1/2.3" (Phone) | Very Tiny (~28 mm²) | Quick daylight snaps | Too cramped; tiny pixels choke in low light |
| APS-C (Crop) | Medium (~370 mm²) | Hobbyists, street photography | 13x larger than phone sensors; great balance of depth |
| Full Frame | Large (~860 mm²) | Professional portraits & low-light | Huge pixels drink in light; zero fake software tricks |
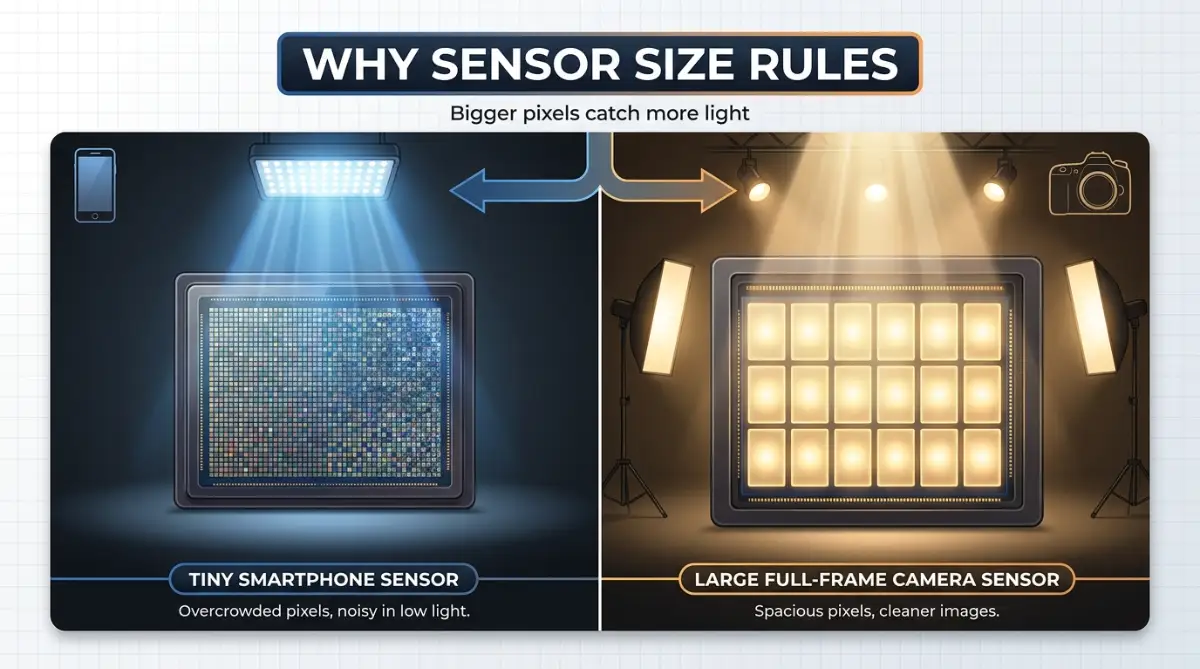
When you crowd millions of tiny pixels onto a small smartphone sensor, things go wrong. Each pixel becomes too small to catch enough light.
Instead of clean details, you get digital noise. This noise looks like grain and weird colored dots in your dark photos. That is why a 12-megapixel DSLR camera will almost always beat a 108-megapixel phone. The DSLR has a giant sensor with big, healthy pixels.
The Light Bucket Analogy: Understanding Pixel Size
Let us make this even simpler to understand. Imagine you have two sensors of the exact same physical size.
One sensor has 12 megapixels, and the other has 48 megapixels. The 12-megapixel sensor has fewer pixels, but each pixel is much larger.
The 48-megapixel sensor has four times as many pixels, but they are tiny.
In bright daylight, both cameras will take great photos because there is plenty of light. The 48-megapixel camera might even show a bit more detail if you zoom in really close.
But as soon as the sun goes down, the story changes completely. The tiny pixels on the 48-megapixel sensor start to starve for light.
They struggle to see anything in the dark. To make up for this, the camera artificially boosts the signal.
This boost is called ISO, and it brings a massive amount of ugly noise into your image. Meanwhile, the 12-megapixel camera keeps taking clean, beautiful photos because its big pixels are still catching enough natural light.
My personal camera journey taught me this lesson the hard way. I used to think I needed the highest number of megapixels to crop my photos later. But after wasting money on a high-megapixel body, I realized that a sharp, well-lit 12-megapixel shot looks ten times better than a grainy 50-megapixel crop. Now, I always prioritize sensor quality over the pixel count.
Why Cheap Glass Ruins Expensive Megapixels
You can have the best sensor in the world, but it means nothing without a good lens. The lens is the window that lets light reach the sensor.
If the window is dirty or made of cheap plastic, the view will be blurry.
Cheap lenses cannot resolve the fine details that a high-megapixel sensor wants to capture. It is like putting cheap tires on a million-dollar sports car. You will never get the performance you paid for.
Many budget phones boast massive megapixel numbers but use tiny, cheap plastic lenses. The light gets bent and distorted before it even touches the sensor.
This results in soft corners, weird color fringing, and a lack of contrast.
If you want truly sharp photos, you should invest in high-quality glass. A sharp lens on an older camera will always outperform a cheap lens on a brand-new high-megapixel camera.
💡 My 30-Second "Glass vs. Gas" Rule:
Before you swipe your card for a new 100MP phone or camera body, ask yourself: Am I paying for real glass or marketing gas?
- Glass wins if you buy a high-quality f/1.8 prime lens for your current setup.
- Gas wins if you buy a 200MP phone that still uses a plastic lens the size of a pinhead. Always put 70% of your budget into your glass.
The Brain of Your Camera: The Image Processor
Once the light passes through the lens and hits the sensor, the job is not done. The raw data must be turned into a photo file that you can share.
This is where the image processor comes in. The processor is the brain of your camera.
It handles color science, noise reduction, and sharpness.
A great processor can make a small sensor look amazing. It uses smart algorithms to clean up noise and make colors pop.
This processing power is the main reason why phone brands can make tiny sensors look so good. They use advanced computer tricks to combine multiple shots into one clean photo.
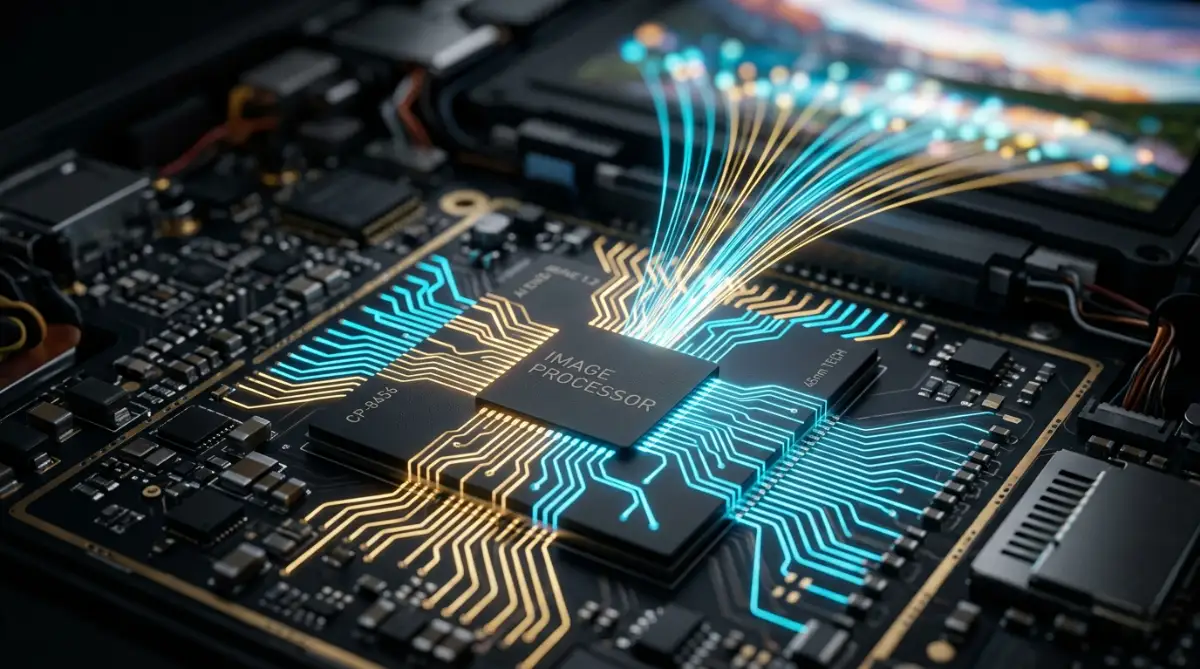
Watch this visual breakdown to see exactly how camera processors handle light and pixels in real-time. This short guide shows the difference between raw sensor power and smart software processing.
This computational photography is impressive, but it has its limits. It can sometimes make photos look fake or over-processed.
A dedicated camera with a larger sensor does not need to fake the look. It captures the natural depth and light because the physics of the hardware are on its side.
The Hidden Power of Dynamic Range
Dynamic range is the camera's ability to capture both the brightest highlights and the darkest shadows in a single shot.
Have you ever taken a photo of a friend standing in front of a bright window?
Usually, either your friend's face is pitch black, or the window is completely blown out and white.
A camera with good dynamic range can capture both your friend's face and the details outside the window.
This ability has almost nothing to do with megapixels. It depends heavily on the quality and size of the pixels on the sensor.
Larger pixels have a higher capacity to store light before they overflow.
This prevents your bright highlights from turning into solid white blocks.
If you want your photos to look professional, look at the dynamic range specs, not the megapixel count.
Myth vs Reality: The Megapixel Marketing Trap
Let us look at some common myths that sales representatives love to tell you in the store.
They want you to believe that more is always better.
But let us look at the actual facts so you can shop smarter.
- Myth: More megapixels mean sharper photos in every situation.
- Reality: High megapixels only look sharp in perfect, bright lighting with expensive lenses.
- Myth: You need at least 50 megapixels to print large posters.
- Reality: A clean 12-megapixel photo can easily be printed on a large canvas without losing visible quality.
- Myth: Professional photographers only use cameras with 100+ megapixels.
- Reality: Many top sports and wildlife photographers use 20-megapixel cameras because they are faster and better in low light.
By understanding these facts, you can save yourself a lot of money. You do not need to chase the highest number on the box.
Instead, look for cameras that offer a balance of sensor size, lens quality, and processing speed.
How to Choose the Right Camera for Your Needs
Now that you know the truth, how do you pick your next camera or phone?
First, think about where you will take most of your photos.
If you love taking photos of your kids indoors or shooting at night, you need large pixels.
Look for a camera with a larger sensor, like an APS-C or full-frame sensor.
If you only take photos outside in bright daylight, you can get away with a smaller sensor and more megapixels.
But remember, those extra megapixels will make your file sizes huge.
You will quickly run out of storage space on your phone or computer.
Large files also make your devices run slower when you try to edit or share them.
For most everyday users, a camera with 12 to 24 megapixels is the sweet spot.
This range gives you plenty of detail for cropping and printing while keeping file sizes small.
It also allows the pixels to be large enough for great low-light performance.
Do not let the marketing hype tell you otherwise. Focus on the physical size of the sensor and the quality of the lens, and your photos will instantly look much better.
Expert Secrets to Getting Pro-Level Sharpness Without Upgrading Your Camera
To truly master your camera, you must understand how to control the light entering the lens. This does not mean you need to buy a brand-new body with a massive pixel count. You can get incredible results by following a few simple steps that professional photographers use every day.
First, you should always shoot your photos in the RAW format instead of JPEG. When you capture photos in JPEG, your camera makes permanent choices about contrast and color. It throws away a massive amount of detail to keep the file size small.
RAW files keep all the raw sensor data exactly as it was captured. This allows you to fix shadows and highlights later on your computer without losing quality. You can learn more about understanding how pixel size works to see how RAW files preserve this clean information[1].
Second, you must learn the sweet spot of your camera lens. Most people think shooting at the widest aperture like f/1.8 gives the sharpest image. However, most lenses are actually sharpest when stopped down to f/5.6 or f/8.
By using these middle apertures, you reduce lens blur and soft edges. This simple adjustment will instantly make your photos look sharper than a basic high-megapixel camera shot.
Third, keeping your camera steady is far more important than having extra pixels. Even the tiny shake of your hands can blur a high-resolution shot and ruin the detail. Using a solid tripod or a fast shutter speed will make a massive difference in your final image clarity.
Similarly, finding resources on how to find safe low interest unsecured loans fast can help you acquire proper studio lighting without sinking into deep debt. Investing in a couple of good studio lights will improve your photo quality much faster than any expensive camera sensor upgrade.
Fourth, you must understand the balance between highlights and shadows. When you are shooting in tough lighting, your sensor has to work extra hard to capture detail. By measuring dynamic range in photos, you can learn how to balance your exposures properly[2].
This prevents your bright skies from blowing out while keeping your shadows clean and detailed. It is a fundamental skill that completely separates amateur snapshots from professional-grade artwork.
Mastering Your Light Sources
Light is the actual paint of your camera sensor. If you shoot in bad, flat light, even a giant medium-format camera will produce boring results. You should always look for directional light, such as during the golden hour just before sunset.
This natural light creates soft shadows and highlights that give your subjects depth. If you shoot indoors, place your subject near a window to catch natural, diffused light instead of using harsh overhead bulbs.
The Power of Manual Settings
Do not rely solely on the automatic mode of your camera. Auto mode often makes bad guesses about your exposure, especially in low light. It will often raise your ISO to high levels, which introduces terrible noise into your clean shots.
Take control by switching to aperture priority or full manual mode. Keep your ISO as low as possible, ideally around 100 or 200, to get the cleanest possible signal from your sensor. You can check expert sensor performance benchmarks to see how different sensors handle noise at different ISO levels.
Understanding Your Shutter Speed
If your subject is moving, you need a fast shutter speed to freeze that motion. If you shoot too slowly, the movement will blur across the pixels. This blur makes people think their camera is bad, but it is just a simple setting mistake.
A good rule of thumb for hand-held shooting is to keep your shutter speed at least double the focal length of your lens. For example, if you are using a 50mm lens, try to shoot at 1/100 of a second or faster. This guarantees that your hand shakes will not ruin the crisp details of your shot.
Chasing the Numbers: Deadly Traps That Ruin Your Photos
The excitement of buying a new camera can make us make some very silly choices. We get so caught up in the marketing hype that we ignore the simple rules of physics. Let us look at the most common mistakes that people make when they try to get sharper images.
One of the biggest mistakes is using digital zoom on your high-megapixel smartphone. Brands love to tell you that their 200-megapixel sensor can zoom in ten times without losing quality. But digital zoom is just cropping your photo. It blows up the tiny pixels, making the final image look like a watercolor painting rather than a crisp photograph.
If you want to zoom in, you must use optical zoom, which uses physical glass lenses to magnify the light. Optical zoom keeps the light quality intact, while digital zoom simply ruins the hard work of your sensor.
Another common mistake is spending all your savings on an expensive camera body while using a cheap kit lens. It is absolutely heartbreaking to see someone use a premium sensor with a basic plastic lens. The lens is what actually focuses the light onto your sensor. If the glass cannot resolve the detail, those extra megapixels are completely wasted.
Always spend more money on your lenses than on your camera body. A great lens can stay with you for decades, while camera bodies get outdated very quickly.
This will save you from major financial headaches that can destroy your dream before it even starts. Similarly, as you build a valuable collection of cameras and lenses, you must protect your assets for the future. Understanding what actually happens to your assets if you die without a legal will is highly important to keep your family safe.
We must also talk about the mistake of ignoring sensor dust. Since mirrorless cameras have exposed sensors, dust can easily get inside when you change lenses. These tiny spots of dust will show up as dark blurs on all your bright photos. Many beginners think their camera is broken and buy a new one, but it just needs a simple cleaning.
Keep a blower in your bag and clean your sensor carefully in a dust-free environment. This simple habit will save you from editing out annoying spots in your photos for hours.
Another mistake is relying too much on post-processing to fix bad lighting. Many beginners think they can just raise the shadows on their computer to make a dark photo look great. But boosting shadows in a dark photo brings out a massive amount of digital noise and color artifacts. It is always better to get the light right in the camera than to try and fix it later.
This saves you time and guarantees that your files remain clean and professional. Spending five extra minutes setting up your shot will save you five hours of painful editing.
Your Action Plan for Perfect Photo Quality
To sum up, megapixels are just a tiny part of the photography puzzle. If you want to take pictures that make people stop and stare, you must focus on the physics of light. Let us look at a simple checklist you can use starting today to improve your photo quality.
First, always prioritize buying a camera with a larger sensor over one with a high megapixel count. Second, invest in high-quality glass lenses that can resolve sharp details. Third, learn to control your light sources instead of relying on high ISO settings.
These three simple changes will completely transform the way your photos look. You will stop worrying about the marketing numbers and start focusing on the actual art of photography.
Remember that the best camera is always the one you have with you. Do not let the lack of expensive gear keep you from exploring your creative passions. Start taking photos with what you have, keep your settings manual, and watch your skills grow every day.
I spent years chasing the highest numbers on the spec sheets only to find disappointment. Once I let go of the megapixel myth, my love for taking photos truly returned. I encourage you to grab your camera today, find a beautiful window of light, and start capturing the world in your own unique style.
Everyday Questions About Megapixels and Camera Gear
Is a 12-megapixel camera enough for printing?
Yes, a clean 12-megapixel photo is more than enough for printing large posters and canvas prints. The viewing distance of large prints means your eyes cannot see individual pixels from a few feet away. Many professional wedding and event photographers use 12-megapixel cameras every single day.
Why do phone brands advertise 108 or 200 megapixels?
Phone brands use these massive numbers because they are easy to market to average consumers who do not understand camera physics. These phones use a technology called pixel binning, which combines multiple tiny pixels into one larger pixel to gather more light. The final photo you get is usually only 12 megapixels anyway, so the big number is mostly a marketing trick.
How do I make my current camera photos look sharper?
You can instantly improve sharpness by using a sturdy tripod to eliminate hand shake. Also, make sure to use your lens's sweet spot, which is usually between f/5.6 and f/8. Finally, always clean your lens elements with a microfiber cloth before you start shooting.
Does megapixel count affect low-light photography?
Yes, having too many megapixels on a small sensor actually hurts your low-light performance. Tiny pixels cannot catch enough photons, which leads to high digital noise and grain in dark areas. A lower-megapixel sensor with larger physical pixels will always take cleaner photos in the dark.
Can a good lens make a cheap camera look professional?
Absolutely, the lens is the single most important factor for image sharpness and color depth. Putting a high-end lens on a budget camera body will produce far better results than putting a cheap lens on an expensive camera body. If you have a limited budget, always spend seventy percent of it on high-quality glass.
Disclaimer: This article is for informational and educational purposes only. The financial and leasing resources mentioned are general suggestions and should not be taken as professional financial or legal advice. Always consult with a certified expert before making major financial decisions or signing legal contracts.
![7 Hidden Signs Your Laptop is Overheating [Avoid These Mistakes]](https://vimex24.com/storage/uploads/blogs/1786454129_7-hidden-signs-your-laptop-is-overheating-avoid-these-mistakes.webp)